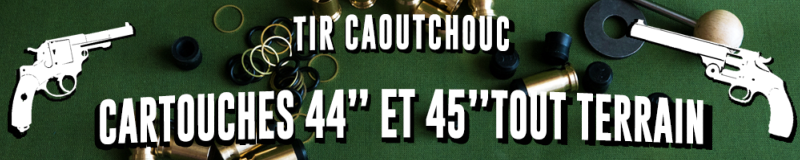
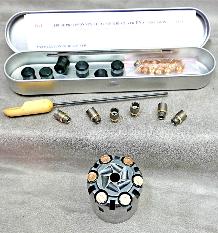
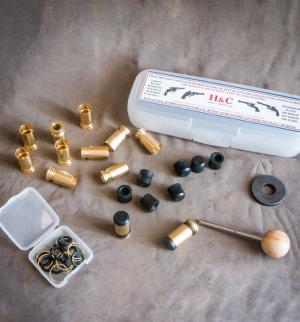
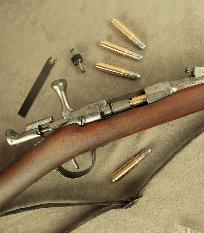
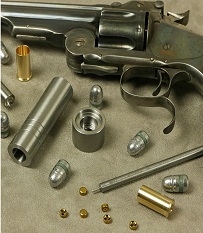
|

**
-------------------------------------------
1) Visser la tige filetée sur le porte-amorce et placer
une amorce standard (pistolet poudre noire), ouverture face au petit orifice du porte-amorce.
**
1 ) Screw the threaded rod onto the primer holder and insert a standard
primer ( black powder pistol ), the open end facing the small opening of the primer holder.
-------------------------------------------
2) Amener le porte-amorce au fond de l’étui et le verrouiller
avec une broche traversant les orifices de l’étui
et du porte-amorce.
**
2) Push the primer holder to the bottom of the empty cartridge case and fix it in place with a pin passing through the openings in the case and the primer holder.

Avant enfoncement complet, on peut
appliquer une goutte de colle sur la broche.
( Beaucoup de colles peuvent convenir, cependant la
« Loctite 648 » a pour l’instant notre préférence) .
Sur les 9 et 12 mm, la broche présente un ajustage
plus serré avec l'étui, pour résister à la pression des gaz lors de la mise à feu. Sa pose se fait donc plus en force, avec une pince. Aucun collage n'est nécessaire.
**
Before pushing the pin all the way, a spot of glue may be applied to it (many kinds of glue are suitable, however our preference at present is for "Loctite 648").
On the 9mm and 12 mm cases, the pin is a tighter fit in the case, to resist the pressure of the gases on firing. It therefore as to be put in position with more force, using a pair of pliers. No gluing is necessary.
-------------------------------------------
3) Dévisser la tige fileté et verser de la poudre noire,
en laissant de la place pour la base de l'ogive.
Attention : à partir de maintenant, tout choc accidentel
sur la broche peut entraîner la mise à feu !!!
**
3) Unscrew the threaded rod and pour in some black powder, leaving some space for the base of the bullet.
Warnig: from this point on, any accidental blow in the pin can set off the charge !!!

-------------------------------------------
4) Placer l’ogive sur l’étui.
Placer la base de l’étui sur le socle, broche dans la fente,
puis l’outil de sertissage
(gorge en bas) sur l’ensemble.
**
4) Put the bullet head onto the case.
Put the base of the cartridge case onto the tool base,
with the pin in the slot. Then put the sizing die (neck down ) over the whole.
-------------------------------------------
5) Regler l'outil d'enfoncement en montant la première
cartouche avec un maillet, forcer progressivement l'ogive jusqu'à
contact, et seulement contact, de son épaulement avec l'étui.
Visser le manchon contre l'outil de sertissage et bloquer le réglage
en serrant le contre-écrou.
**
5 ) Set the seating tool by seating the first cartridge with a mallet, forcing the bullet head progressively into the case
until it is shoulder deep, and only shoulder deep, in the case.
Srew the bushing down against the sizing die and fix the setting by tightening the nut.

-------------------------------------------
6) Sertissage : FACULTATIF
N’y recourir que lorsque, pour une quelconque raison, on veut
prévenir absolument un déchaussement de l’ogive.
**
6) Crimping: OPTIONAL.
This should only be done when, forwhatever reason, you are particulary anxious to avoid possibility of the bullet head becoming loose.
------------------------------------------------
Préalable pour un poinçonnage suffisant mais non perforant
Si besoin :
-Ajuster la longueur des ergots en la réduisant avec une lime.
-Ou cercler l’outil de sertissage d’autant de tours
de ruban adhésif que nécessaire
-Ou munir les ergots de rondelles intercalaires d’épaisseur convenable.
Placer la cartouche dans l’outil de sertissage, puis les ergots dans les orifices latéraux.
Donner un coup de maillet .
**
7mm and 9mm pinfire:
preliminary step necessary for sufficient crimping without perforation.
If necessary:
-adjust the length of the crimping pins by filing them.
-or wraps as a many turns of adhesive tapes as necessary around the sizing die.
-or put washers of a suitable thickness between the crimping pins and the tool body.
Put the cartridge into the sizing die, then the crimping pins into the lateral holes. Strike with a mallet.
Le sertissage se fait par rétrécissement du collet, comme sur le 11 mm 73
**
12mm Pinfire:
The crimping is done using the narrowing of the fillet (as on the 11mm 73).
**
Sur certaines armes la broche peut gêner la rotation du barillet.
Incliner alors la broche vers l'arrière d'environ 3° ( 7mm broche) ou la raccourcir avec une pince coupante (9mm et 12 mm broche).
**
With certain weapons the pin can be inhibit the rotation of the cylinder.
In such circumstances, bend the pin backwards about 3 degrees (7mm broche) or get it shorter with a tool ( 9mm and 12 mm pinfire).

-------------------------------------------
APRES LE TIR :
7) Désamorçage
Au fond de l’étui, visser la tige fileté sur le porte-amorce.
Retirer la broche et extraire le porte-amorce. Retirer l’amorce brûlée
Ne pas oublier de nettoyer l’étui, le porte-amorce et la broche
(eau chaude et détergeant amonniaqué).
**
AFTER SHOOTING:
7) Depriming.
In the bottom of the cartridge, screw the threaded rod onto the primer holder. Pull out the pin and remove the primer holder. Remove the spent primer. Don't forget to clean the case, the primer holder, and the pin (hot water and detergent).
-------------------------------------------
8) Recalibrage:
Lubrifier l’étui avant recalibrage.
**
8) Resizing:
Lubricate the case before resizing.
-------------------------------------------
9) Ejection
L’étui est prêt à être rechargé.
**
9) Ejection:
The case is ready for reloading.

Avant de tirer, faire vérifier votre arme par un armutier.
N'utiliser QUE de la poudre noire.
**
Before shooting, have tour gun checked by a gunsmith.
Use black powder ONLY.
Accueil
7 / 9 mm Broche
32 RF
320 BullDog
Commander
News
Contact